SeqKit-2.2.0 Porting Guide (openEuler 20.03 LTS SP3)
1. Software Introduction
SeqKit is an efficient, comprehensive cross-platform tool for fasta/q processing. SeqKit provides an executable binary file covering all mainstream OSs, including Windows, Linux, and MacOS X, and can be directly used without any configuration or pre-configuration.
For more information about SeqKit, visit the official website at https://bioinf.shenwei.me/seqkit/.
Language: Go
One-sentence description: fasta/q processing tool
Open source license: MIT license
Recommended version: SeqKit v2.2.0
2. Environment Requirements
2.1. Hardware Requirements
| Item | Description |
|---|---|
| CPU | Kunpeng 920 |
| Memory size | 32 GB 2666 MHz x 16 |
| NIC | 1 x 10GE |
2.2. Software Requirements
| Item | Version | Download URL |
|---|---|---|
| SeqKit | 2.2.0 | https://github.com/shenwei356/seqkit/archive/refs/tags/v2.2.0.tar.gz |
| BiSheng compiler | 2.1.0 | https://www.hikunpeng.com/en/developer/devkit/compiler/bisheng |
| Go | Go 1.18 | https://dl.google.com/go/go1.18.linux-arm64.tar.gz |
2.3. Operating Systems
| Item | Version | Download URL |
|---|---|---|
| openEuler | openEuler 20.03 SP3 | https://repo.openeuler.org/openEuler-20.03-LTS-SP3/ |
| Kernel | 4.19.90 | https://gitee.com/openeuler/kernel |
3. Porting Planning
This chapter lists the software installation paths involved in the SeqKit software porting.
Porting planning:
| No. | Software Installation Path | Usage | Description |
|---|---|---|---|
| 1 | /usr/local/bisheng | Planned installation path of the BiSheng compiler. | The installation paths provided here are only examples. Shared paths are recommended. The actual installation paths may be different, and you need to change the installation paths in subsequent commands in this blog based on your requirements. |
| 2 | /usr/local/seqkit/go | Planned installation path of the Go environment. | |
| 3 | /usr/local/seqkit/seqkit | Planned installation path of SeqKit. |
4. Compilation Environment Configuration
Prerequisites: The installation packages have been uploaded to the corresponding directories on the server using the SFTP tool.
Configuration procedure:
| No. | Item | Description |
|---|---|---|
| 1 | Setting up the Kunpeng base software | Set up the Kunpeng base software. For details, see section 4.1. |
| 2 | Installing dependencies | Install the Yum dependency. For details, see section 4.2. |
| 3 | Deploying the Go environment | Deploy the Go environment. For details, see section 4.3. |
4.1 Kunpeng Base Software Setup
4.1.1 Installing from a Yum Source
Step 1 Add the configuration file bisheng-compiler.repo to the /etc/yum.repos.d/ directory.
cat > /etc/yum.repos.d/bisheng-compiler.repo << EOF

[bisheng-compiler]

name=bisheng-compiler

baseurl=https://repo.oepkgs.net/bisheng/aarch64/

enabled=1

gpgcheck=0

priority=100

EOF
Step 2 Download and install the RPM package of the BiSheng compiler from the Yum repository.
yum update
yum install bisheng-compiler -y
Step 3 (Optional) Clear the hash table in the current window.
If an LLVM compiler of another version is available in the system, run the following command immediately after installing the BiSheng compiler:
hash -r
This prevents the Clang command from being captured by the hash table. Otherwise, the BiSheng compiler or the open source LLVM compiler cannot be used.
Step 4 Check whether the installation is successful.
After the installation is complete, run the following command to verify the BiSheng compiler's version:
clang -v
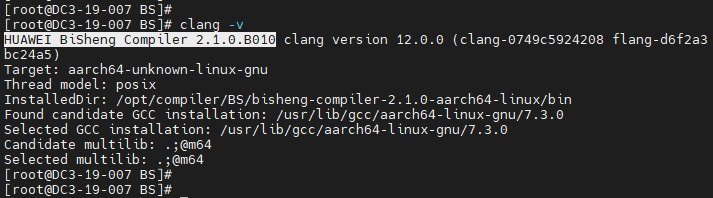
If the command output contains the BiSheng compiler version information, the installation is successful.
4.1.2 Software Package Installation Mode
Step 1 Make preparations.
Download the BiSheng compiler on the BiSheng compiler page and upload it to the server.
Software package download: https://www.hikunpeng.com/en/developer/devkit/compiler/bisheng
Step 2 Install the environment dependency items of the BiSheng compiler.
yum install -y gcc glibc libatomic bc tar
Step 3 Create the installation directory of the BiSheng compiler.
mkdir -p /usr/local/bisheng
Note: In the preceding command, /usr/local/ is an example. Replace it with an actual path.
Step 4 Download the BiSheng compiler package and decompress it.
cd /usr/local/bisheng
wget https://mirrors.huaweicloud.com/kunpeng/archive/compiler/bisheng_compiler/bisheng-compiler-2.1.0-aarch64-linux.tar.gz --no-check-certificate
tar -zxvf bisheng-compiler-2.1.0-aarch64-linux.tar.gz
After the decompression, the bisheng-compiler-2.1.0-aarch64-linux directory is generated in the current directory.
Step 5 Install the environment-modules tool.
yum install environment-modules -y
source /etc/profile
Step 6 Create an environment variable configuration file.
vi /usr/local/bisheng/bisheng_modulefiles
The following content is added:
#%Module1.0
conflict bisheng
prepend-path PATH /usr/local/bisheng/bisheng-compiler-2.1.0-aarch64-linux/bin
prepend-path LD_LIBRARY_PATH /usr/local/bisheng/bisheng-compiler-2.1.0-aarch64-linux/lib
Step 7 Load environment variables in the current shell.
module use /usr/local/bisheng/
module load /usr/local/bisheng/bisheng_modulefiles
Note: (Optional) To prevent variables from being imported every time a shell is opened, you are advised to write the environment variables to the system configuration file.
vi /etc/profile
The following content is added:
module use /usr/local/bisheng/
module load /usr/local/bisheng/bisheng_modulefiles
Step 8 Make the environment variables take effect.
source /etc/profile
Step 9 (Optional) Clear the hash table in the current window.
If an LLVM compiler of another version is available in the system, run the following command immediately after installing the BiSheng compiler:
hash -r
This prevents the Clang command from being captured by the hash table. Otherwise, the BiSheng compiler or the open source LLVM compiler cannot be used.
Step 10 Check whether the installation is successful.
After the installation is complete, run the following command to verify the BiSheng compiler's version:
clang -v
If the command output contains the BiSheng compiler version information, the installation is successful.
----End
4.2 Dependency Installation
Step 1 Install the dependency package from a Yum source.
 yum -y install git gcc gcc-c++ vim
 source /etc/profile
4.3 Go Environment Deployment
Step 1 Use PuTTY to log in to the server as user root. Step 2 Go to the /home directory.
cd /home
Step 3 Obtain the Go package.
wget https://dl.google.com/go/go1.18.linux-arm64.tar.gz
Step 4 Create an installation path.
mkdir -p /usr/local/seqkit/
Step 5 Decompress the Go installation package.
tar -zxvf go1.18.linux-arm64.tar.gz -C /usr/local/seqkit/
Note: Decompress the package based on the actual package name. Step 6 Configure environment variables.
vi /usr/local/seqkit/go/go_modulefiles
The following content is added:
#%Module1.0
conflict go
set GO /usr/local/seqkit/go
setenv GO $GO
prepend-path PATH $GO/bin
Step 7 Load environment variables.
module use /usr/local/seqkit/go
module load /usr/local/seqkit/go/go_modulefiles
Step 8 (Optional) To prevent variables from being imported every time a shell is opened, write the environment variables to the system configuration file.
vi /etc/profile
The following content is added:
module use /usr/local/seqkit/go
module load /usr/local/seqkit/go/go_modulefiles
Step 9 Make the environment variables take effect.
source /etc/profile
Step 10 Run the following command to check the installation path:
ls /usr/local/seqkit/go/

Step 11 Check the version number.
go version

Step 12 Replace the Go source with the source from China.
go env -w GOPROXY=https://goproxy.cn
5. Source Code Obtaining
Step 1 Download the SeqKit installation package v2.2.0.tar.gz.
Download address: https://github.com/shenwei356/seqkit/archive/refs/tags/v2.2.0.tar.gz
6. Compilation and Installation
Step 1 Use PuTTY to log in to the server as user root. Step 2 Go to the /home directory.
cd /home
Step 3 Obtain the source package.
wget https://github.com/shenwei356/seqkit/archive/refs/tags/v2.2.0.tar.gz
Step 4 Decompress the package.
mv v2.2.0.tar.gz seqkit-2.2.0.tar.gz && tar -xvf seqkit-2.2.0.tar.gz
Step 5 Configure the compilation.
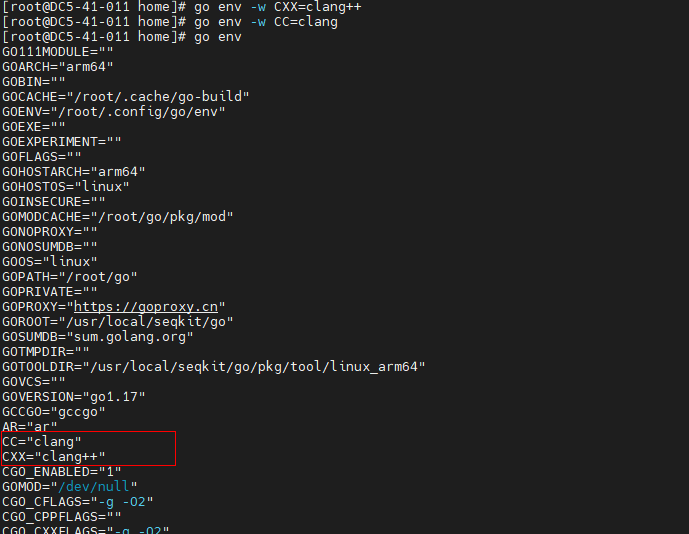
go env -w CXX=clang++
go env -w CC=clang
go env
Step 6 Perform the compilation.
cd seqkit-2.2.0/seqkit/
go build

Step 7 Perform the installation.
mkdir -p /usr/local/seqkit/seqkit/bin
cp ./seqkit /usr/local/seqkit/seqkit/bin
ls /usr/local/seqkit/seqkit/bin

Step 8 Set environment variables.
vi /usr/local/seqkit/seqkit/seqkit_modulefiles
The following content is added:
#%Module1.0
conflict seqkit
set SEQKIT /usr/local/seqkit/seqkit
setenv SEQKIT $SEQKIT
prepend-path PATH $SEQKIT/bin
Step 9 Load environment variables.
module use /usr/local/seqkit/seqkit
module load /usr/local/seqkit/seqkit/seqkit_modulefiles
Step 10 (Optional) To prevent variables from being imported every time a shell is opened, write the environment variables to the system configuration file.
vi /etc/profile
The following content is added:
module use /usr/local/seqkit/seqkit
module load /usr/local/seqkit/seqkit/seqkit_modulefiles
Step 11 Make the environment variables take effect.
source /etc/profile
----End
7. Running and Verification
Data source: The test verification data and scripts are obtained from the SeqKit source package. For details about how to download the source package, see section 5. The data and scripts are stored in:
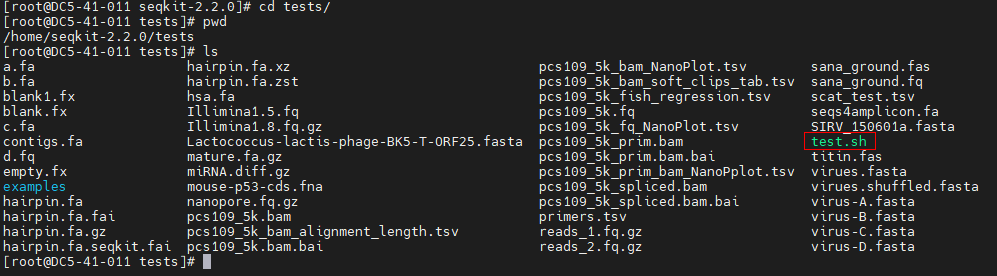
Step 1 Use PuTTY to log in to the server as user root. Step 2 Go to the source package directory.
cd /home/seqkit-2.2.0/
Step 3 Copy the test verification script to the current directory.
cp tests/test.sh ./
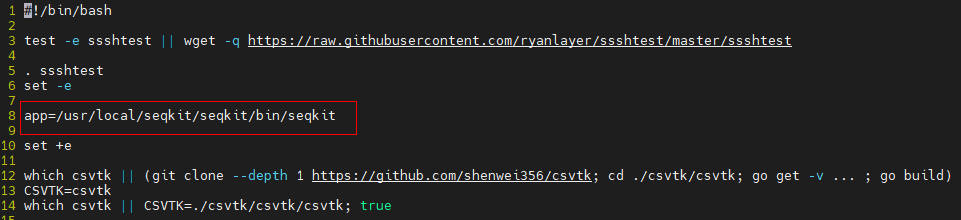
Step 4 Edit the script, delete the SeqKit generation command, and change the SeqKit path in the script to the installation path.
vi test.sh
Note: The installation path varies according to the actual situation. Before the change:
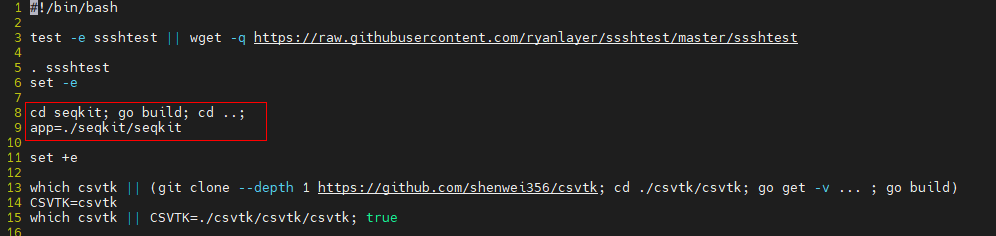
After the change:
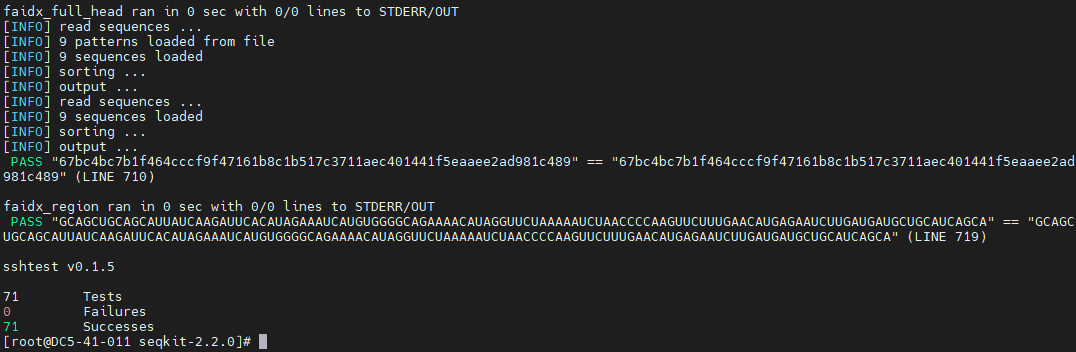
Step 5 Run the following command to check the running of SeqKit:
bash test.sh
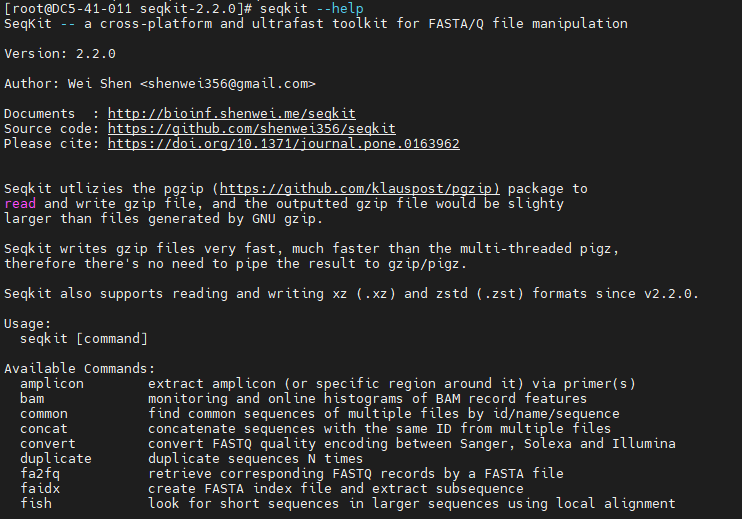
Step 6 View SeqKit details. seqkit --help
----End
8. Change History
| Date | Description |
|---|---|
| 2023-02-08 | This issue is the first official release. |
| 2023-02-10 | This issue is the second official release. |


